Friday, 10 April 2015

Die Waffenkammer/JTFM Enterprises StuG III Ausf G review

More StuG goodness now! This time with the JTFM/Die Waffenkammer StuG III.

The StuG III was actually quite a diminutive vehicle, even by the standards of the day being only just over 7 feet tall and 9 wide, and 22 feet long including the gun. The vehicle still managed to weigh 23 tonnes, and had a maximum armour thickness of 80mm's. StuG's carried a crew of 5 and 54 rounds of ammunition for it's 75mm main armament. 


The StuG had a top speed of around 25mph and used about 1 gallon of fuel per mile traveled. The last recorded combat use of a StuG III was in 1967 in the Six Day War when it was used by Syrian forces. Bulgaria also had some dug into it's borders as static emplacements until relatively recently.

JTFM Enterprises, or as is more correctly know Die Waffenkammer produce a fairly large range of exquisite resin vehicles in 1/56 scale. Much like the Blitzkrieg Miniatures StuH 42 I reviewed here the Die Waffenkammer model comes in only a few main parts, notabley the tracks, hull, Schurzen rails, Scurzen plates, choice of machine gun, and main gun, as well as figures and a bag of stowage. 

It's worth mentioning the sheer amount of options this kit comes with. Firstly you have the choice of building either a StuH42 or Ausf G with anti tank gun, then if you pick the anti tank gun you have a choice between the standard box mantlet, or later Saukopfblend rounded one. Also included are the earlier style plate gun shield for the MG34, and the later remote controlled weapon mount. Finally, the kit is the only one to come with separate Scurzen rails and Schurzen plates, allowing you to easily model missing plates of Schurzen. 
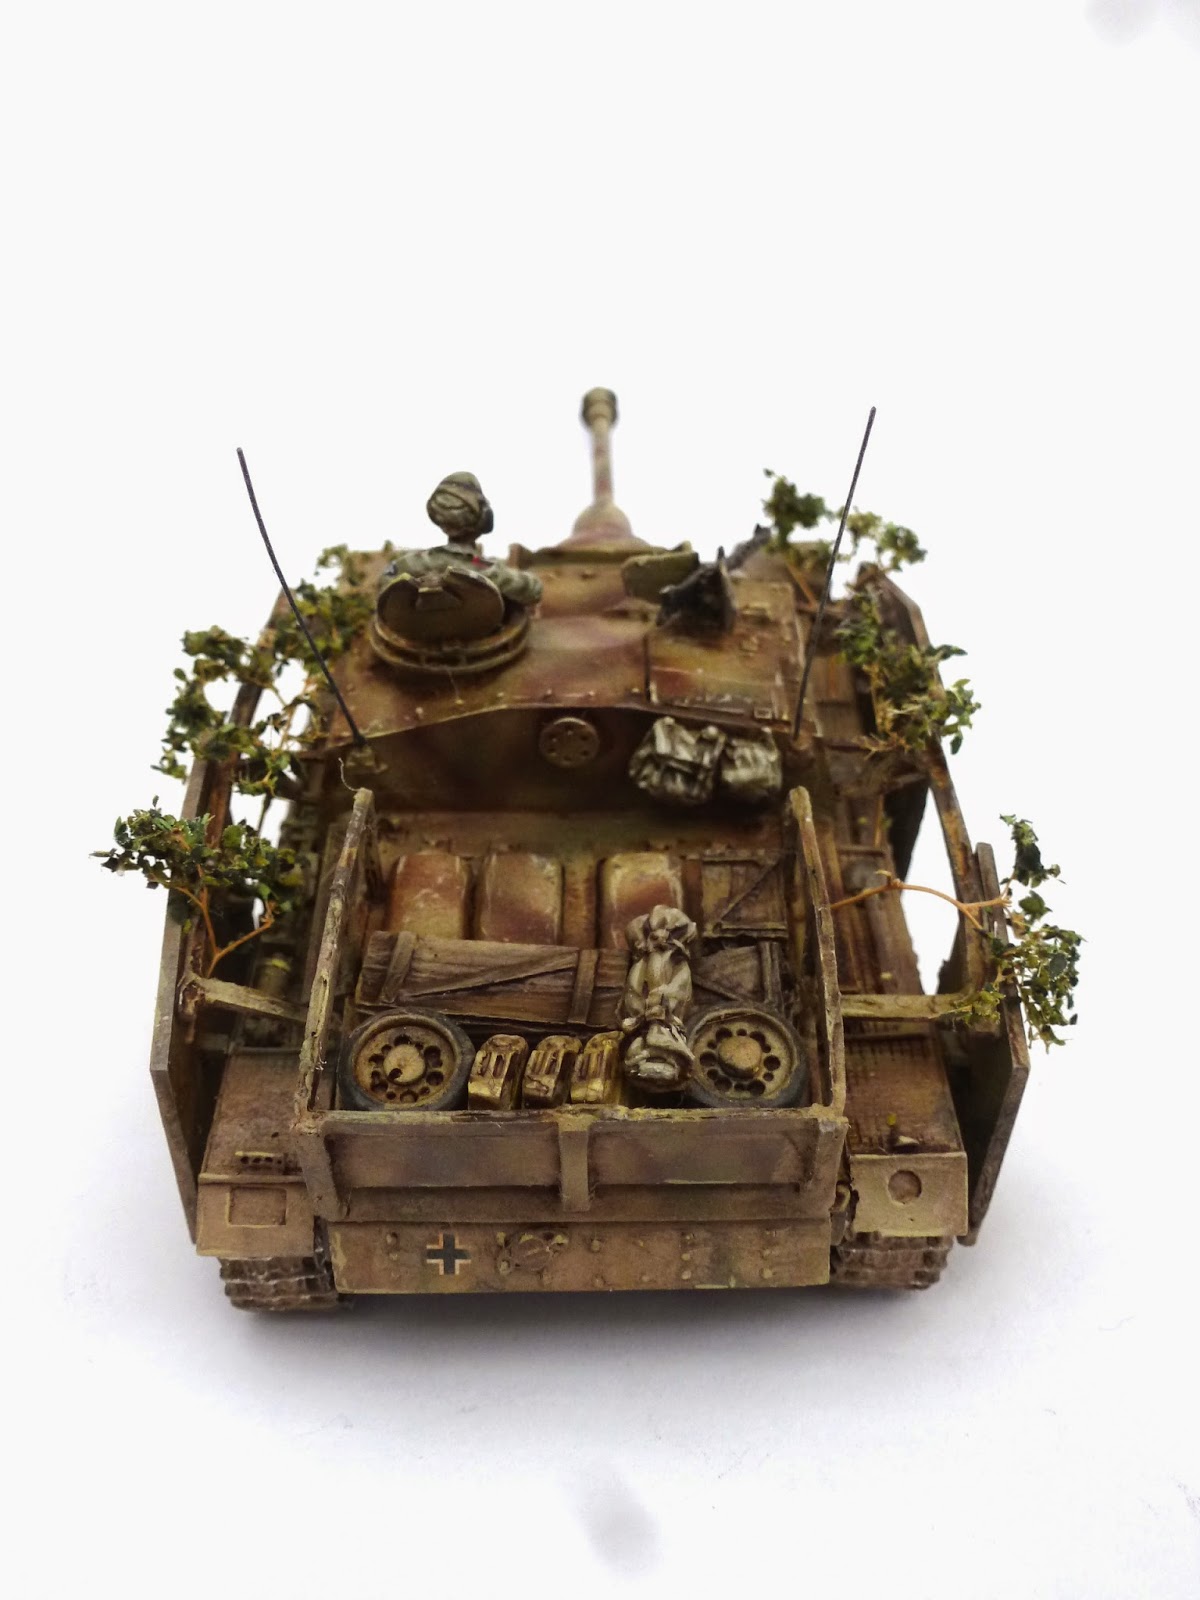
In terms of accessories, the kit is very generously appointed, all the stowage on this one including the stowage rack around the engine deck were included, and the model comes with all the stowage shown both on this model and the Blitzkrieg one. So much in fact I even had some spare. The model also comes with 3 crew figures to give you even more options and spares.

Detail wise the kit is fantastic, and builds a spectacular representation of this vehicle. When assembling the vehicle with Schurzen though you may wish to reinforce the plates as they are quite delicate. It's not possible to have swappable guns straight from the box, however if you wished to magnetize the model you could do so.

To paint the Die Waffenkammer StuG I again used the same techniques listed in the Warlord Stug Review here.
It is even more important than ever to use a decent primer on Die Waffenkammer models however, and details of this are included on the models instruction sheet.

Foliage was seafoam, added as described in the Blitzkrieg StuH review.

The Die Waffenkammer website can be found here, however there can be quite a long wait between placing an order and receiving the models as Jeff has always got a vast amount of orders. It's worth being patient though as you'll get a very nice model at the end. Alternatively, if you can't wait check out the list of distributers on the page and it will list the stockists local to your country.

In conclusion, a beautiful kit, with no real flaws. As ever more of my work can be seen at Volley Fire Painting Services 

Tomorrow I will be reviewing Rubicons new plastic StuG, and on Sunday I will be writing a comparative piece of all 4 StuGs mentioned, and also including Warlords older Resin model too.  

Links to the other reviews can be found below:-

Blitzkrieg

Rubicon
Warlord

1/56 Blitzkrieg StuH 42 Review

Second article for StuG week sees me reviewing Blitzkrieg miniatures 1/56 scale StuH 42.  You can read part one where I review Warlords new plastic StuG III here.

The StuH 42 was introduced into service in March 1943 and served right through until the end of the war. It was designed to provide greater infantry support capability on the proven StuG III chassis, and all but a few prototypes were built using the StuG III G Hull, and fitting it with a 105mm howitzer, with nearly 1300 being produced by the end of the war.


Blitzkrieg have a growing reputation for producing excellent vehicle kits in both 1/56 and 1/48 scale. The models couldn't be simpler to build and come in the bare minimum of parts. The StuH 42 consisted of a solid hull, separate gun, and separate hatches and machine gun mount, the model took around 5 minutes to build, and required the barest minimum of cleaning up.

When working with resin it's vitally important to wash the models in warm soapy water, and use a proper primer. I use an enamel car primer from Supadec, you can pick it up for about £5 on Ebay, although Halfords do a superb primer as well. It's important to use an enamel primer as it's much harder wearing and acrylic primers don't tend to get as much purchase on the resin as these. 

Once I'd left the primer to dry 24 hours I sprayed the model with Vallejo Middlestone using the same techniques to bring light and shade to the kit as described in my review of Warlords kit.

To make the foliage I use seafoam sprigs and leaves purchased from Antenocitis workshop. To prepare them select a sprig, paint it with pva glue and sprinkle it with the leaves. Leave it to dry for a few hours and then cut off some small amounts using references as a guide to the sizes used on the real thing.

Stowage and crew figures came from the JTFM/Die Waffenkammer kit, which is reviewed here

The only negatives to the model are that it doesn't have any Scurzen plates, and I found in a few places the detail wasn't as crisp as I'd like. On the plus side though the model is very strong, and couldn't be simpler to build!Overall Blitzkriegs StuH is a very nice and simple model and if you are pressed for time and want something ready to go pretty much straight from the box, its a great model.

Antenocitis workshop can be found here


Links to the other StuG reviews for Stug week can be found at these links

Die Waffenkammer
Rubicon
Warlord
Blitzkrieg miniatures can be purchased from here

As ever, my work can be viewed at Volley Fire Painting Services

Thursday, 9 April 2015

Warlord Games 1/56 Scale StuG III G Review
                            Forget your Tigers and Panthers, the Sturmgeschütz III was the most common German armoured vehicle of WW2, and also accounted for more vehicle kills than any other vehicle. 

Introduced in 1940 with a short barreled 75mm gun, it was originally intended to support the infantry in attacking positions, it evolved to be a deadly tank destroyer. By 1944 the StuG was actually filling up the numbers in Panzer regiments to make up the shortfall in tank production. From 1943 a dedicated fire support variant with a 105mm howitzer was also produced, and this was designated the StuH 42.

For WW2 gaming every German player wants at least one of these sexy little vehicles ( This is my 6th painted one so far...) and to mark the importance of the vehicle Warlord and Italeri have produced this rather nice little model. In this article I'll talk about the model, and how I painted it. Tomorrow I'll look at the Resin models of the StuG that are available, Saturday I'll Review Rubicons new StuG, and Sunday I'll do a comparative review to show how they all look together. Finally on Monday I will look at some of the kits of other variants of the StuG, as all those reviewed so far are on the Ausf G series, so I shall look at some StuG IV's and Warlords resin Ausf D kit.


Warlords StuG III is currently up for pre-order and I was able to get my hands on a pre-release version of the kit. The model comes on 2 sprues and is very crisply molded in dark grey plastic. The model comes with optional parts to make either a StuG III Ausf G with 75mm gun, a StuH 42 with 105mm Howitzer,optional schurzen, optional position crew and cooling hatches on the engine deck, as well as many separate tools, and optional smoke launchers, Oh, and a commander figure! Also included is a decal sheet with numbers and a few divisional crests.

Detail is superb throughout, particularly note worthy is the fine anti slipping texture on the mud guards, the Schurzen and supports is commendably fine, and I really liked the detail on the wheels and tracks. The tools have far more detail and relief than other vehicle kits in this scale, and the weapon and launcher barrels are pre-drilled.


 The kit is simple to build, with no real trouble spots, although there are a lot of fine parts that require tweezers. Take your time and follow the instructions, and you will have a beautiful model. My sample came before the instructions were ready so it too a bit longer to build, but I managed to get the kit together in around an hour and a half. One nice thing is you can leave the gun barrels loose as they are cleverly designed to click into place. 

The only slight negative is that the Schurzen skirts are a little delicate straight from the box but with a bit sprue spacing beneath the tracks and plates would give a lot of strength and be invisible. I can't recommend enough the importance of using a proper plastic glue though for all these types of models. EMA plastic weld is my favourite, as it is immensely strong, but also gives you a bit of time to work with the parts before they are fully set. 

I wanted to model a vehicle produced between February and March 1943 so added the smoke launchers, but to tie the model into my very late war forces I added Schurzen plates that came from a few different sources, and also gave the StuG a gun barrel still in it's priming paint. I decided not to use the transfers, and instead opted to paint the numbers on by hand to give a hastily applied feel. On my model the 75mm barrel is grey, whilst the 105mm is in red brown primer to suggest hasty replacements.


To paint the model I started off with a grey primer, then airbrushed black paint into all the recesses, white paint onto all the high points, and then sprayed Vallejo middlestone over the entire vehicle, before adding a camouflage pattern of reflective green.


The model was then painted with some gloss varnish, before I used a wash of artists oils to accentuate the detail by painting it into the panel lines. I added chipping using a bit of packaging foam, and then used a fine brush to pick out the raised areas and edges of chipping with some Middlestone mixed with white. Mud was done using games work shop Agrellan Earth.

A quick blast of matt varnish and the StuG was done. 


Colour
Vallejo Paint
Games Workshop colour
Dunkel Gelb (Sand)
882 Middlestone
Ushabti Bone

Dunkel Grun (Green)
890 Reflective Green

Straken Green


In conclusion, this is an incredible model, very well detailed, with a good fit and some nice options.  I thoroughly recommend it.  

Warlords StuG is available here http://www.warlordgames.com/ and costs £20.


Reviews for other StuGs can be found at the links below
Blitzkrieg
Die Waffenkammer
Rubicon


You can see more of my work, and contact me here at Volley Fire Painting Services. Check back tomorrow as I will be looking at Die Waffenkammers StuG III G, and also Blitzkriegs StuG 42! 

Sunday, 29 March 2015

Warlord Games German Ostfront Command

I was very honoured to be asked by my friends over at Warlord games to paint some of their recently released German Ostfront Command figures.

These are older models that have been released from the archive and are beautiful sculpts. My favourite is the vehicle crewman carrying his wounded friend. The figures are as usual very cleanly cast, and full of character.

The radio operator and the pointing officer are both wearing Waffen SS smocks, whilst the medic is wearing tunic and trousers from 1943 onwards.


 The tank crew can be either assault gun crew or in Panzer blacks. In readiness for Warlords upcoming StuG release though I painted mine in field grey assault gun wraps.

The colours used can be found in the painting German's guide I have on Warlords website here.

You can get your own set of the figures here


My work as ever can be seen at Volley Fire Painting

Beyond the Gates of Antares Concord Strike Force

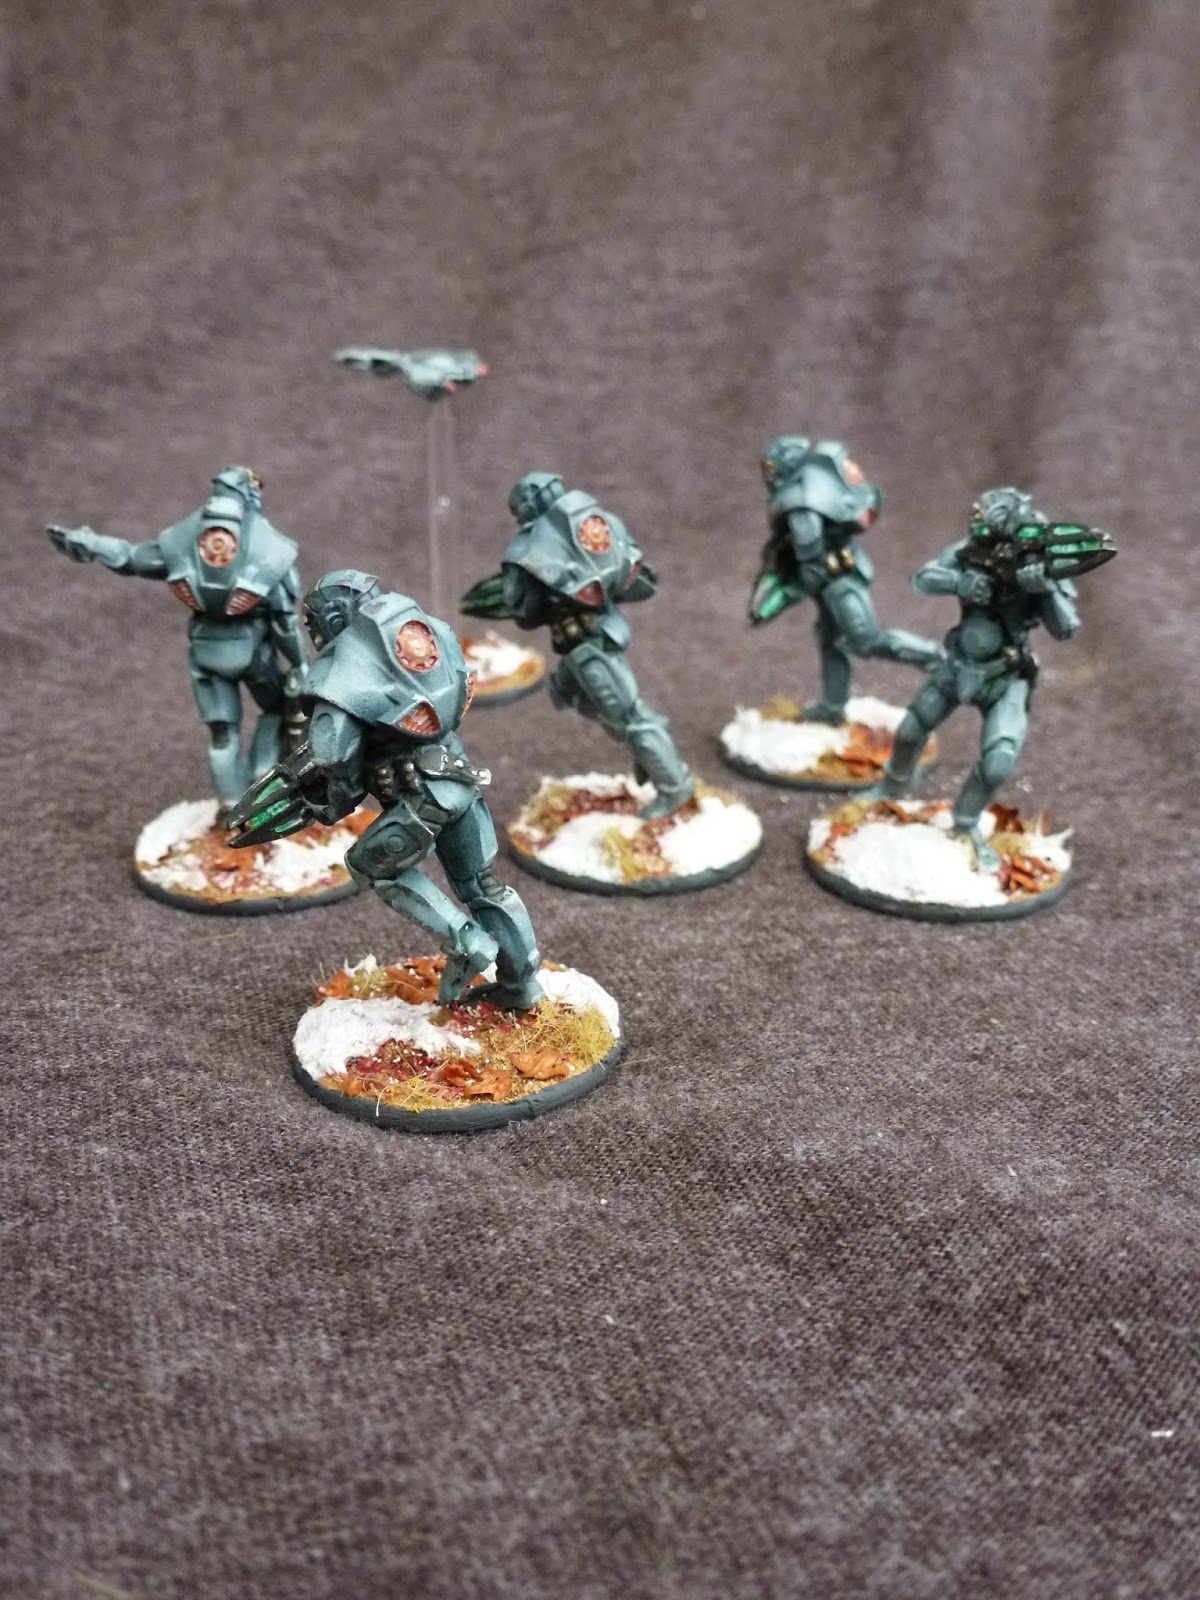
For Warlords upcoming game Beyond the Gates of Antares I have chosen the Concord as my faction of choice (So far). I love the high tech feel and hard sci-fi look to their armour, especially as it reminds me a little of the Fallout series of computer games. More on that later...


My force is currently comprised of the contents of the Concord Strike team starter army, and I've played several games with them now which you can read about here


The models are possibly the best cast figures I've worked with. They require no cleaning up, and after a quick priming are ready to go. I painted mine with a mixture of airbrushing and inking, using a base of Vallejo 972 light green blue. I then shade the figures with layers and mixes of Army Painter Green and Blue inks. Colour inspiration came from the power armour worn by several factions in Fallout, and I was wanting to try out different levels of texture to mimic the game effects.


In game terms the Concord are very well armoured and have both accurate and powerful firepower. 

Balancing this their forces are seem smaller than the other armies in the game, and are quite fragile at close range. the phrase glass cannon could have been coined for them.


 I'm going to be expanding my force with some extra units as and when the become available, Warlord have already teased images of Concord on jet bikes and heavily armoured Drop Troops who look awesome. 

Antares is definitely a game to watch, and you can download the beta version of the rules for free from Warlords website

As ever more of my work can be seen here at Volley Fire

Warlord Games plastic T34/76 review

Another week another review!

This ones been out a little while now, but I've only just got around to painting it. Now, I had every intention of modelling the tank for my Russians, however whilst Googling around looking for photo's of T34's I came accross this picture of a Captured T34. Seeing as my mid war SS force is based around the 2nd SS Panzer Division Das Reich who operated a lot of T34's in 1943 I decided to give mine a change of ownership. 

The simple route to making a Beute Panzer (Booty Panzer!) is to paint the tank in it's natural colours, put some crosses on and Bob's your aunty Mavis. As you can see from the period photo that inspired the build though sometimes the Germans added or altered the vehicles. This ranged from everything from new Cupolas, Schurzen plates, guns, weapons, it's a pretty endless list. 

Warlords new T34/76 is a superb kit. the model is very, very simple to assemble. The kit has a nice little commander figure, and has optional hull flame thrower to make an OT/34 variant, plus a choice of 3 turrets, though sadly only 1 gun and turret ring.  Tracks and suspension are simple and well detailed. Excluding the extra modelling work I inflicted on myself I think the build took about 20 minutes. If you've build Warlords T34/85 you will know what to expect from this.

I added some spare Schurzen plates from a Warlord Panther, as well as some bits of stowage from my spares box. The commanders is from Warlords Panzer IV, and the grumpy looking bareheaded guy is from Warlords tank crew set.

The only area worth mentioning is the optional fuel tanks on the rear hull. The best way to fit these is by butting the edge of the fuel tank up against the exhaust, and the top edge of the fuel tank butted against the hinge of the air vents.

The track join on Warlords kits has the potential to be very prominent, however it is possible to reduce this almost completely. To do so make sure you are using a proper plastic glue, my preference is EMA plastic weld which is actually a solvent, although something like Revell or Liqued poly are ok too.


 I leave track and suspension units off the model until it is painted as this makes weathering and painting easier. Once I'm done attacking them with Crayola's I put hold the top run of tracks in place and apply glue to all the contact points between the wheels and tracks. Leave this about 15-20 seconds for the glue to eat into the plastic and then do the same thing with the bottom run of tracks. Using a glue like plastic weld allows you to use an old paint brush to paint the glue onto the model, and lets you run glue along the joins. Applying some pressure eliminates most of the join, with minimal clean up required.

 The tank was airbrushed using Vallejo Model Colour paint over a grey car primer. I tend not to use model air as I prefer to thin my own paints for spraying.

Colour
Vallejo Paint
Games Workshop colour
Dunkel Gelb (Sand)
882 Middlestone
Ushabti Bone

RotBraun (Brown)
846 Mahogany

Skrag Brown


Dunkel Grun (Green)
890 Reflective Green

Straken Green


Shading was added using Dayler Rowney artists oils, and mud was from Games Workshop Agrellan Earth special effect paint.

I've not included comparison shots this time with other T34's on the market as my conversion work has rendered it very hard to compare and do a fair view of Warlords kit, so I shall be building another as Uncle Joe intended and that shall be used in comparison photos.Size wise the model is identical with other kits on the market, and you can happily mix it into other existing 1/56 scale vehicle models.

For more captured tank research check out this website Beute Panzer

I can't recommend snm stuff enough for modelling supplies, here's a link to some plastic weld. Get some, it's brilliant for plastic work.I'm not even being sponsored by them, it's just such a useful tool Go here, buy this

Warlords website is here 

Lastly, my work can be seen here Volley Fire Painting Services

Tuesday, 17 March 2015

To Warlord, and Beyond! (the Gates of Antares)

Last week I had the prevelage of visiting Warlord Games to have a few games of Beyond the Gates of Antares using the recently released Concord Strike Force, against Jez Allum and Sam Phillips whom both used Algoryn armies. My force consisted of the contents of Warlords new Concord Starter army.

 After a quick tour of the Studio and seeing some amazing stuff that is due to be released over the next few months Jez and I set to having our first game.


 This was the first time I've played Beyond the Gates of Antares, and we were guided by Richard Dando, although having played Bolt Action the rules were simple and quick to pick up, despite still being the beta version.

Antares allows you far more reaction choices, and has more detail to the game than Bolt Action, however it doesn't get bogged down in details and is very intuitive. The Algoryn forces appear to be very flexible and are good at both range and melee/close quarters, whereas the Concord played best at keeping their enemies at arms length due to their superior firearms and body armour.

Jez managed to beat me in the first game however the second saw me wrestle a hard fought win against Sam.

I'm a fan of Bolt Action, but I really enjoyed the flow of Antares, it felt even more nail biting as the firing was more likely to result in kills, and pins are easy to shake, making games feel quicker. I found myself using the rally order more in those two games than I have in all the Bolt Action I've played!

Also worthy of note is that the game makes far use of statistics than BA for it's units, as I discovered when one of my squads horrendously failed an agility test to climb a small wall, fell over, then got shot to pieces. The dance Jez performed in his moment of triumph more than made up for this however.

I really urge anyone interested in sci-fi gaming to check out Beyond the Gates of Antares here. Currently the beta version of the rules are available to download from Warlords website.

More of my painting can be found at Volley Fire Painting Services

I'd like to extend my thanks to everyone at Warlord Games for a fantastic day, and to Richard Dando Rick Priestly and Andy Hobday in particular. Can't wait for the rematches!