
First off I'd like to start this review with an apology to Warlord Games who kindly provided the review model, I had intended to get this second stage of the Panzer III review uploaded a week ago, however have had some family concerns that have eaten into my work time.
 You can read the first part of my review of Warlords new 1/56 scale Panzer III Here, and all my comments regarding the build apply to this model as well, for obvious reasons. This time though I decided to build a later Ausf M vehicle, I was going to leave the gun barrel loose so I could swap it with a short barrel for an N, however I may have managed to damage the gun, and then loose it, so I simply glued the long 50mm anti tank gun and had myself an M...
It's worth talking about the Schurzen this time. The kit comes with a full length of 6 panels per side for the hull, however after a bit of digging I found the most common fit was to only have the 4 central plates, so I trimmed the end plates off with a sharp knife and job was a good un.
 The Schurzen panels can be a little fiddly to fit as they are very fine. Luckily the attachment points for the hanging rails are quite small parts, however if you clean them up properly and have ensured you follow the instructions and drilled out the appropriate holes, they fit perfectly and are very secure. As ever I'd recommend using a proper plastic solvent such as EMA plastic weld when building a plastic model. as the join is strong, although the drying time is fairly long so you have time to work with the parts.
The safest way to protect your sanity when building Schurzen is to fit the hangers, and then let them dry for a few hours. Once they have set start by attaching the plates at one end of the model, and then working round to the other end of the model. I attached the turret Schurzen before painting, but whilst I attached the hanging rails, I didn't attach the hull Schurzen plates.

With the turret I started on the left side, glued on the first plate, skipped the hatch and attached the long curved rear piece, then did the right front plate. After letting the glue set for a moment I then attached the schurzen hatch. and added a tiny point more glue to help reinforce the joint.
The hull Schurzen followed much the same process, the attachment points on the Schurzen are much deeper than on the StuG or Panzer IV that Warlord do, and it was a matter of moments to fit them .
With Warlord's upcoming plastic Fallschirmjager, as well as the Perry's new line of tropical themed Fallschirmjager, I've been contemplating an Italian theater themed force, and so decided to paint my Panzer in a plain DunkelGelb, ostensibly to make a vehicle from 15th Panzer Division
 I paint my Dunkelgelb with an airbrush, starting with a grey primer, spraying black into all the recesses, white onto all the high points, and then misting on very light coats of Vallejo Middlestone, allowing the shading colours to shine through.
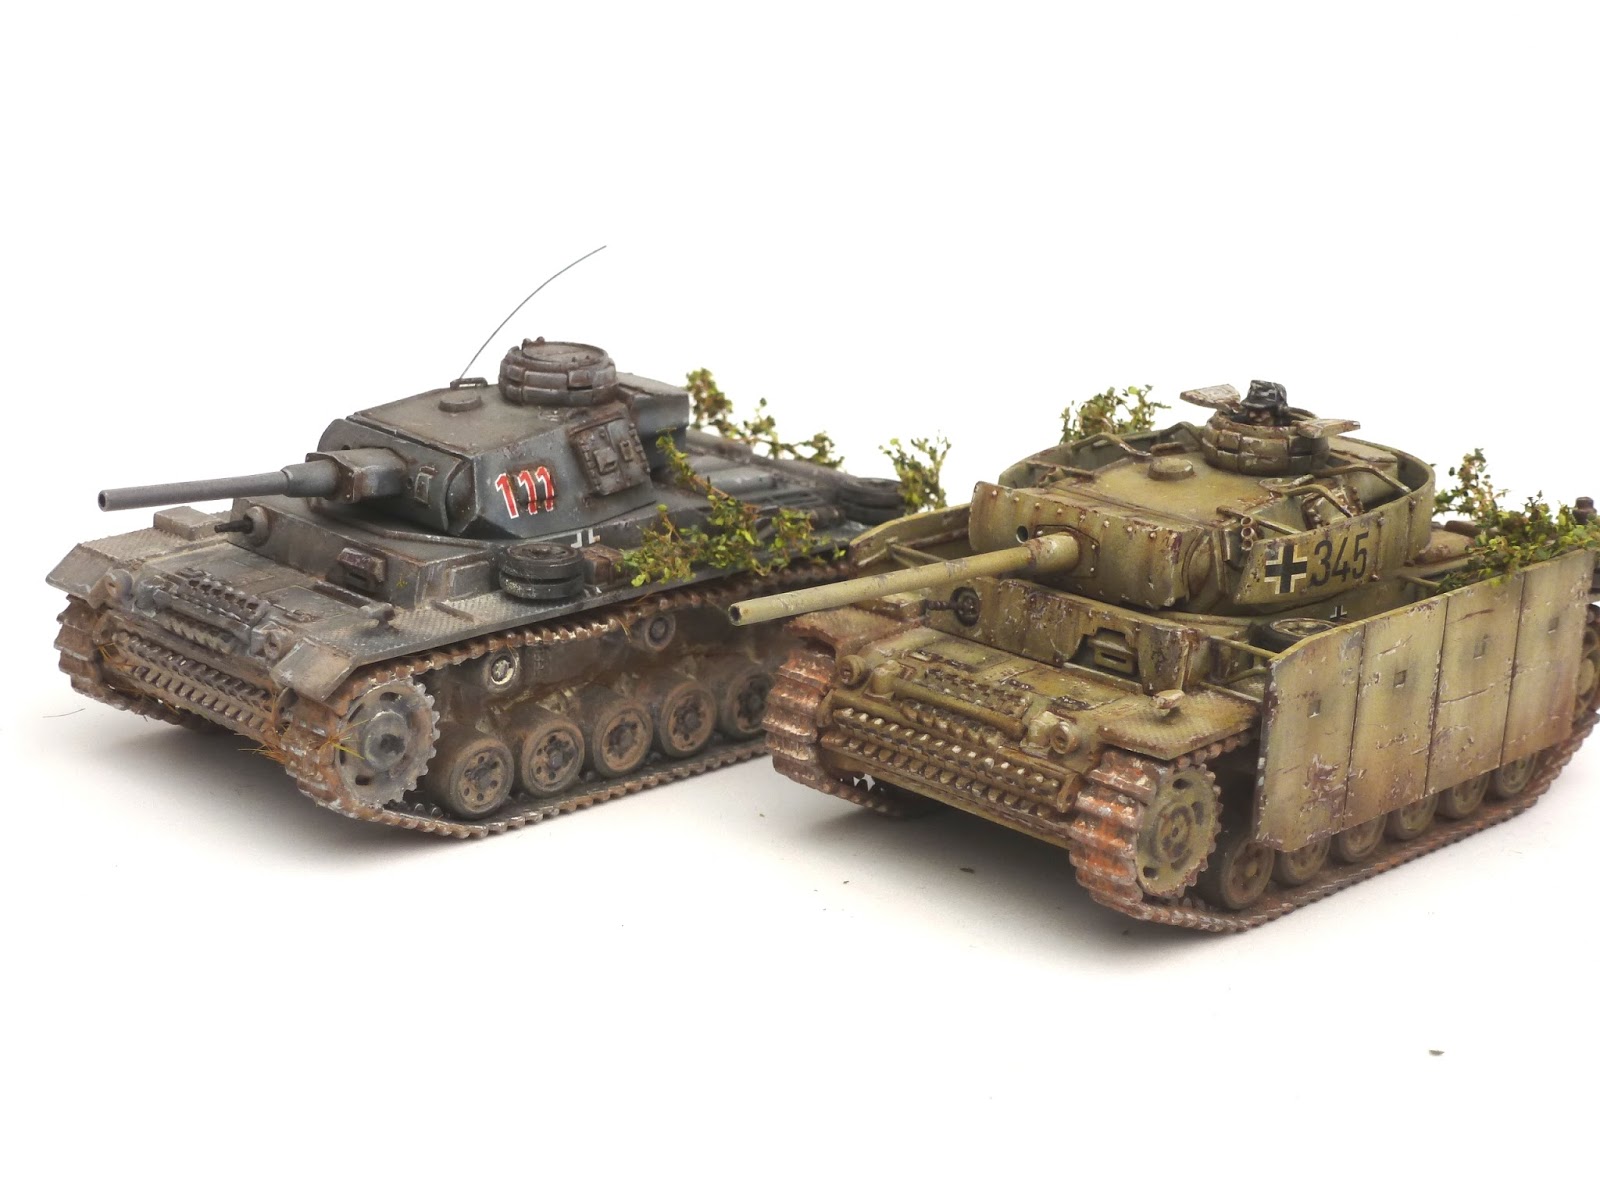
With a simple single colour scheme I like to add some interest to the model with weathering, so added lots of chips using Vallejo Hull Red and Gun Metal applied using the packing sponge from a blister pack, dabbed aroudn areas of high use. To add final enhancement to the chips I use Vallejo Pale Sand painted around the edges to make them show and give a 3D effect.
Further weathering was added using a wash of artists oils burn umber painted into the recesses, and tiny amounts of brown, white and black oils painted in tiny dots onto the surface, and then worked into the finish to create subtle wear and fading effects.
Final weathering came in the form of Mig Pigments painted around the running gear, tracks and lower hull.

Foliage was created using Sea Foam sprigs, and some leaves that I think were designed for 15mm models, however I can't recall as I've had them for about 10 years and have lost the original packaging... You can get sea foam and some leaves from Artisan Quarters. The sprigs might seem expensive, but they do last for an eternity.
As every you can see more of my work at Volley Fire Painting Services and you can order a (model) Panzer III for yourself from Warlord Games
Great work on the weathering! It really looks spot on. My only concern with this kit would be the Schürzen. I have the StuG and those tiny hangers instantly broke off as soon as the model was used for the first time.
ReplyDeleteI've found them quite sturdy actually, You have to make sure you don't trim off the lower connectors for the hull though too, between them it braces the model and works well
ReplyDeleteDo you offer any videos of your painting process for German armor?
ReplyDeleteI don't, there are a few step by step guides on the Warlord page I've done, but I don't have the facilities or time to do video
DeleteHi Andy
ReplyDeleteDo you ever get any reaction using the burnt umber wash over acrylic paint?
John